Just-In-Time role assignment in Microsoft Defender
For a long time assigning multiple Entra ID (Azure AD) roles to a user was a tedious task in not done via a script. Every role assignment had to be made separately. This also made it hard to change role assignments for a group of people.
That all changed when Microsoft introduced Entra ID (Azure AD) role-assignable groups. It is now possible to assign multiple roles to one group and add the users to this group. This makes it much easier to manage those role assignments.
The Privileged Identity Management features add additional security features like Just-In-Time role assignment. This means the user is not assigned permanently to the role but is only eligible to use it when she needs it. After a defined time, the active role assignment is removed automatically. Also, it allows to implement an approval process for high privileged roles.
But until a few weeks ago those features where only available for Entra ID (Azure AD) roles and Azure resources. Other services with their own role management capabilities did not support PIM. You could use access packages to assign groups, but this was not a good option, because it meant a second place for the administrator to request permissions.
With Privileged Access groups currently in preview this changes. It is now possible to enable an Entra ID (Azure AD) role-assignable group for privileged access features. Now it is possible to assign a user or a group of users as eligible to another AD group and use this group to map the necessary roles in your application of choice.
This could be Intune, Exchange, Compliance or as I will demonstrate the Microsoft 365 Defender portal.
Plan your roles
First you will have to decide which capabilities or even device groups you want to protect using PIM.
- You might want to put your analyst in a permanent eligible assignment to access the portal to do their day-to-day business.
- The second assignment could for using live response, but only after additional approval.
- And a third assignment group is only for those who need to get administrative permission in the portal. This, again, is protected by an approval workflow.
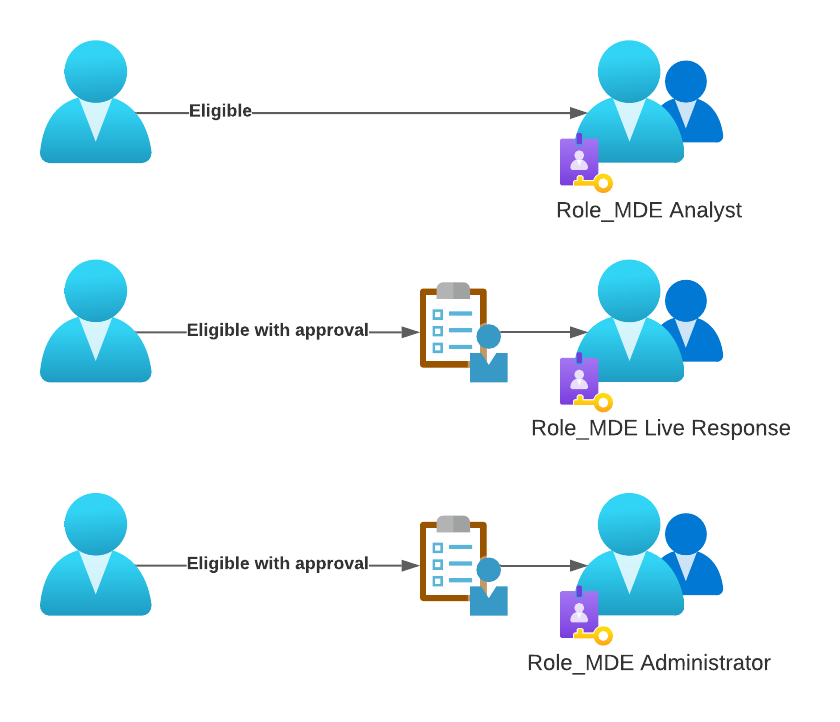
When you plan this for your environment check which roles you currently use and which actions you might want to put behind an approval workflow. You could also go as far as to protect different device groups from being accessed without approval.
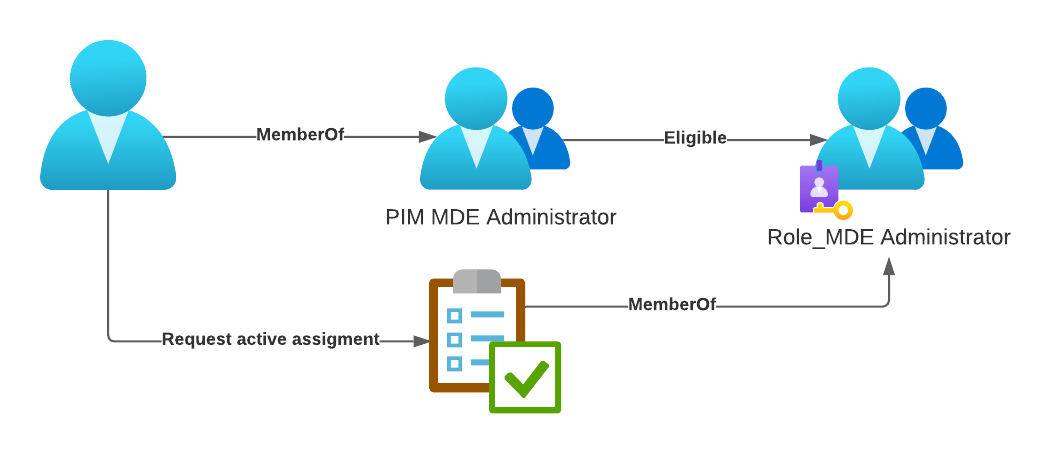
In this walkthrough I will show you how to implement an approval-based workflow to get MDE Administrator permissions. It includes n users assigned to a Entra ID (Azure AD) security group (“PIM MDE Administrator”). This group will be eligible to request MemberOf status of the role enabled group (“Role_MDE Administrator”). This group is assigned to the “Microsoft Defender for Endpoint administrator (default)” role in the Microsoft 365 Defender portal.
Azure AD implementation
Create Azure AD security group
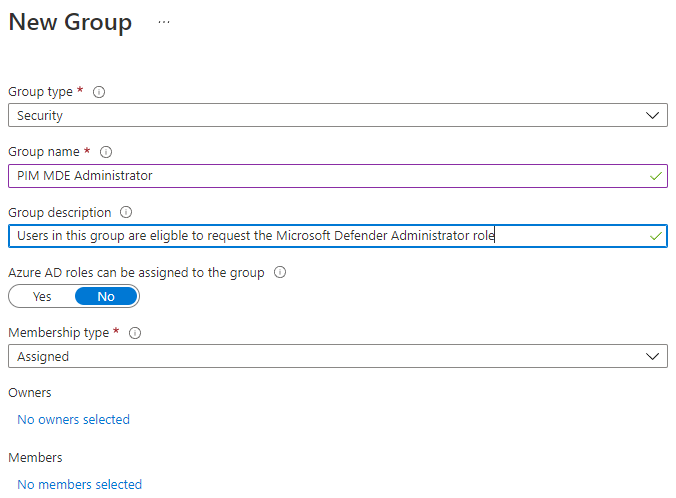
This group, named “PIM MDE Administrator”, will be used to avoid having to add each user as eligible later.
Since this is a normal Entra ID (Azure AD) group you just have to define a name and a description.
Create Azure AD role enabled groups
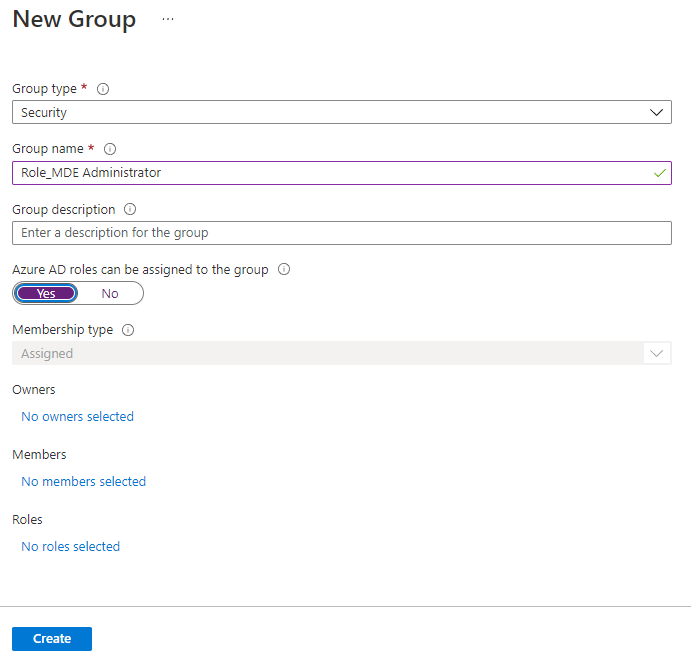
Next you must create a second Entra ID (Azure AD) group, but you have to enable the option “Entra ID (Azure AD) roles can be assigned to the group”. This can only be done when creating the group and cannot be changed later. This group is called “Role_MDE Administrator” in this example.
Add users to the group
Add the users to the “PIM MDE Administrator” group. Since they will be only eligible they can’t use this permission directly but only after activating it.

Enable Privileged access
Now switch to the “Role_MDE Administrator” group and enable the Privileged access feature.
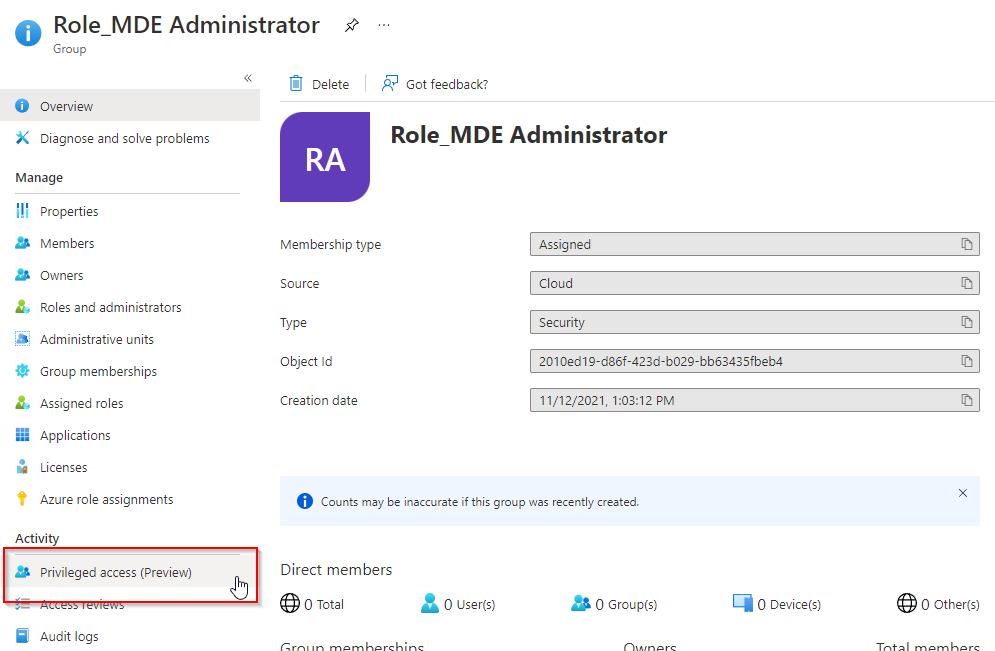
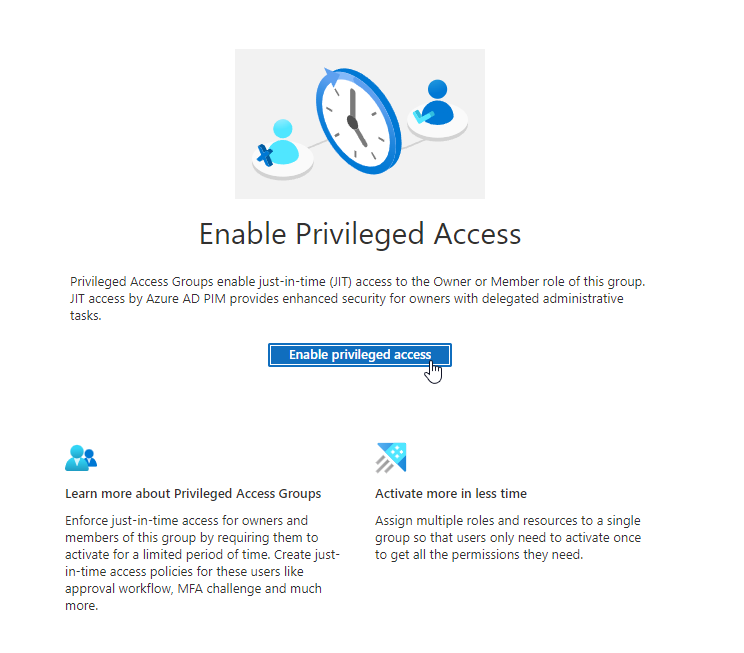
Change assignment settings
After you enabled this feature, you can now switch to the tab and click on settings. This is where you will have to define how a user or group can be assigned to this group and configure advanced settings e.g. if an approval is needed.

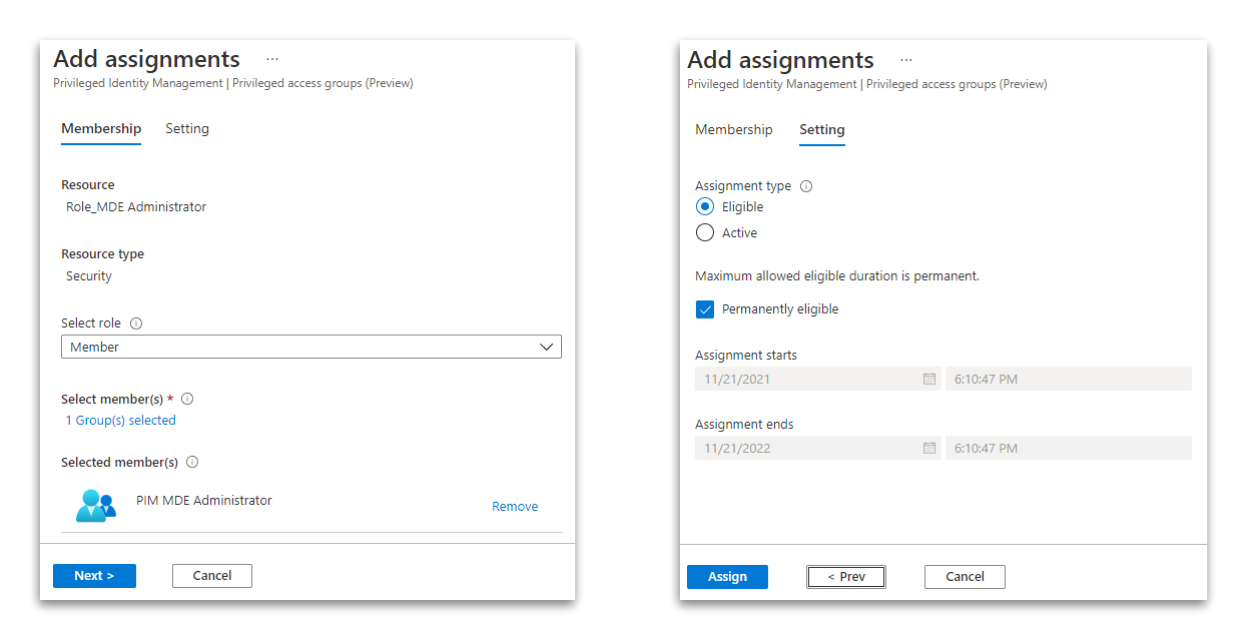
After choosing settings select “Member” because this is the membership type, we want to users to have.

Change how an activation of this role is handled. In this case I require an approval from a named user.
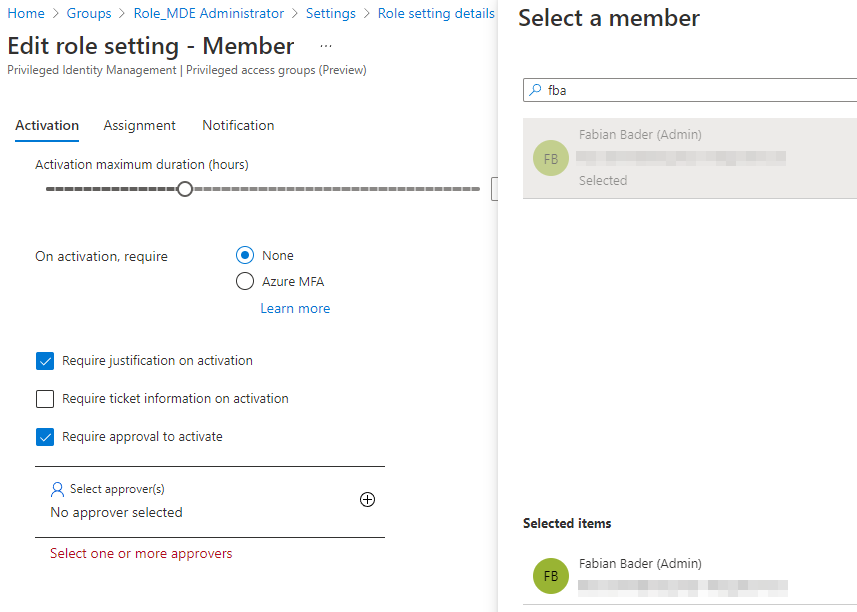
And since an approval is needed, and I use a group for the user assignment, I changed the setting to allow a permanent eligible assignment.
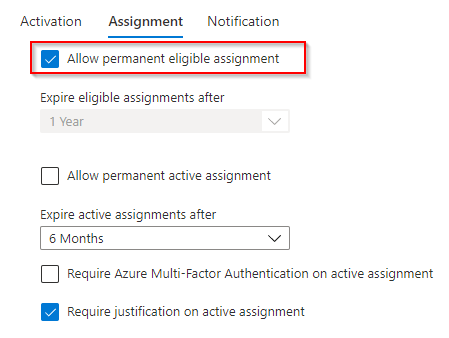
Add eligible assignment
At last, add the “PIM MDE Administrator” as a permanent eligible assignment.
Your Entra ID (Azure AD) is now all set up. Let’s switch to the Defender portal.
Microsoft 365 Defender
Enable Role Management for Defender
You have to enable role-based access control in the settings on security.microsoft.com if this was not already done. You must be member of the Entra ID (Azure AD) Global Administrator or Security Administrator role to access the portal after you make the change. All other users will lose their access until you assign them a new role.

After enabling the RBAC feature the default administrator role is the only role present.

Create roles and add permissions and groups in MDE portal
Administrator
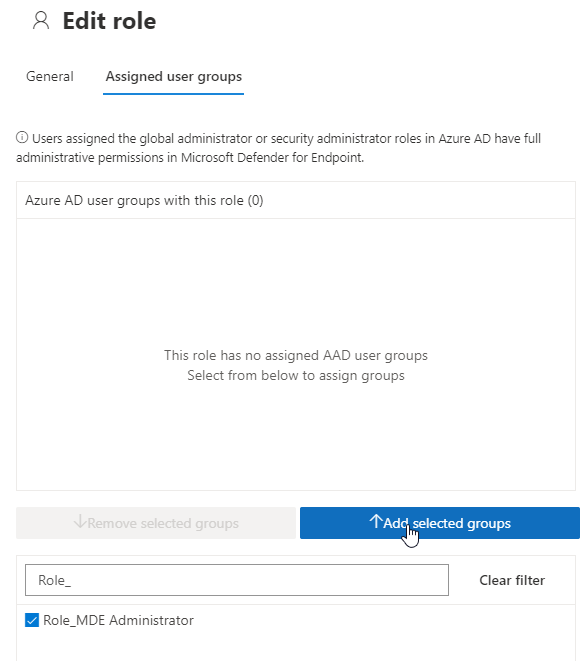
First add the “Role_MDE Administrator” to the default administrator role.
Basic access
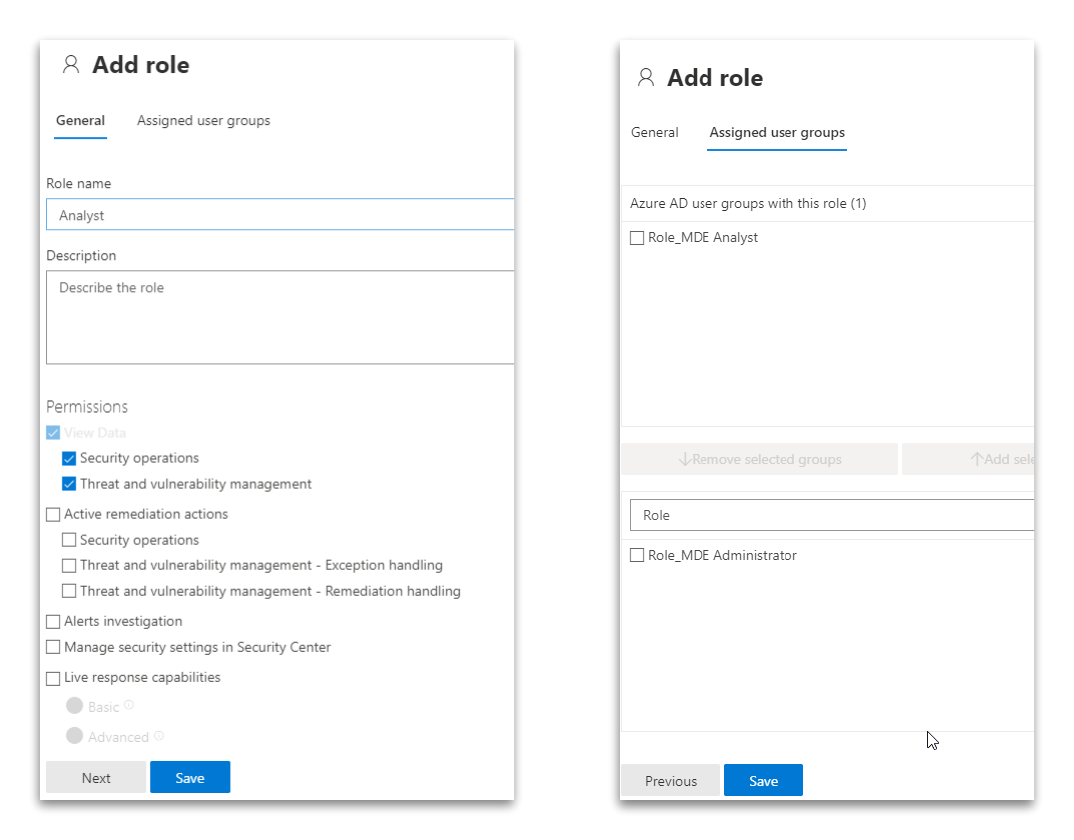
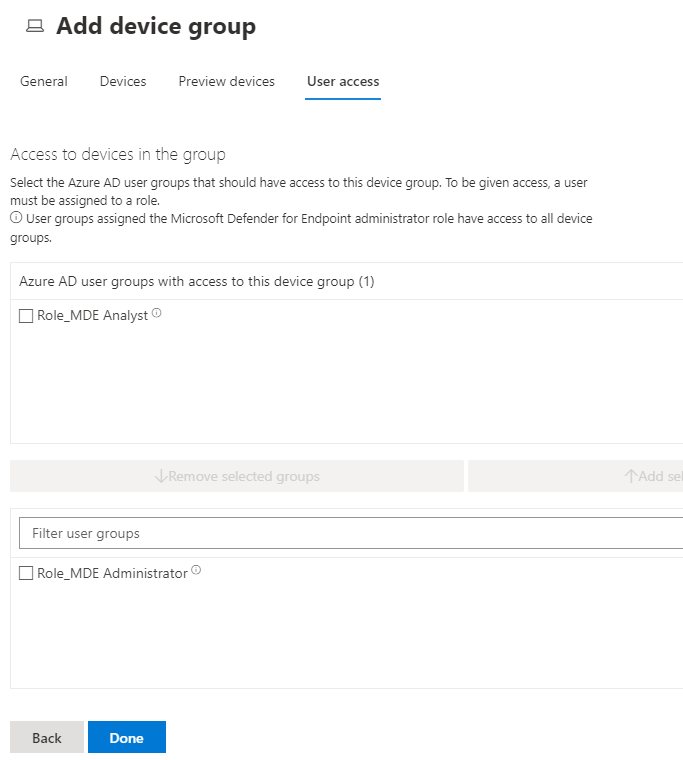
Next create your other roles and add the respective Entra ID (Azure AD) groups to them. I use a basic analyst role group as an example.
Test your setup
Now it’s time to check out if your setup is working as expected.
Request access
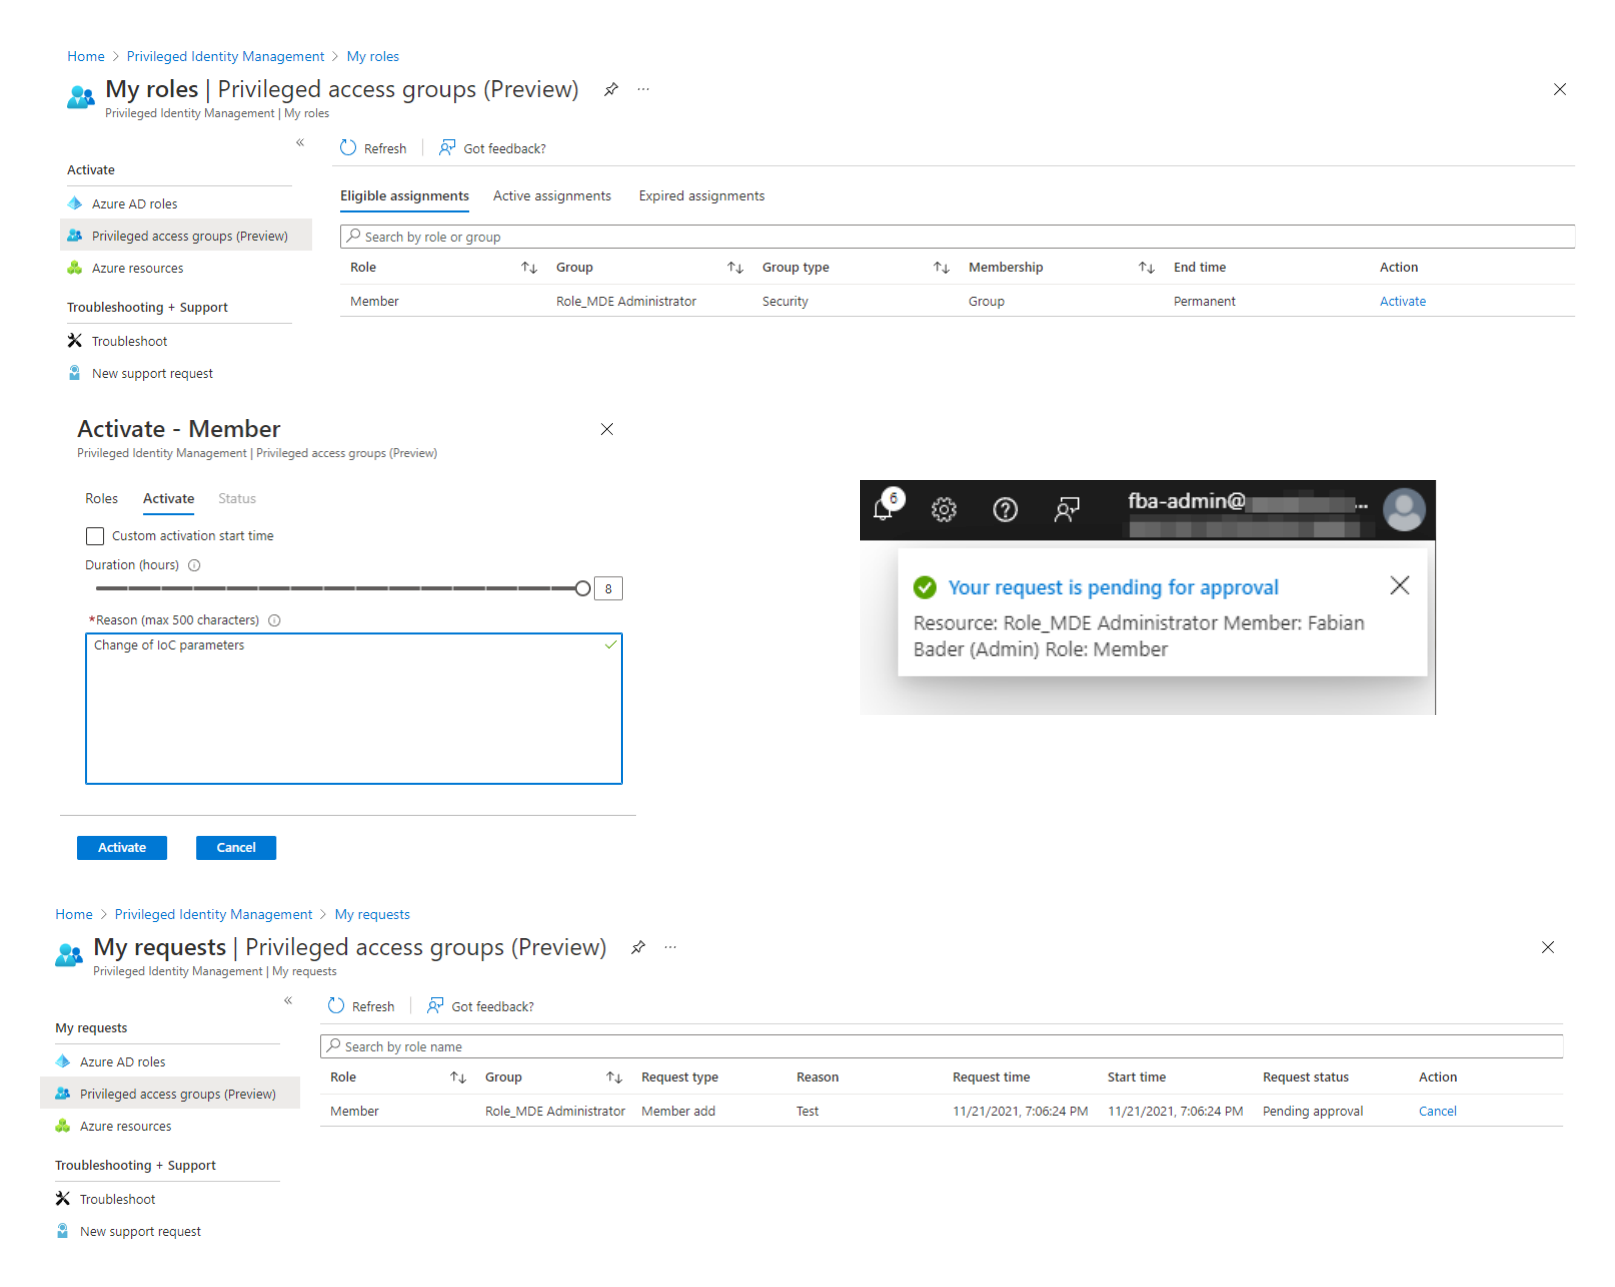
Access the “Privileged Identity Management” portal and select “My roles” and “Privileged access groups”
You should see the “Role_MDE Administrator” under “Eligible assignments” with membership type “Group”. Click “Activate” to start the activation workflow. Enter a justification and after clicking on “activate” your request is pending for approval.
You can check the current state in the “My requests” blade.
Approval
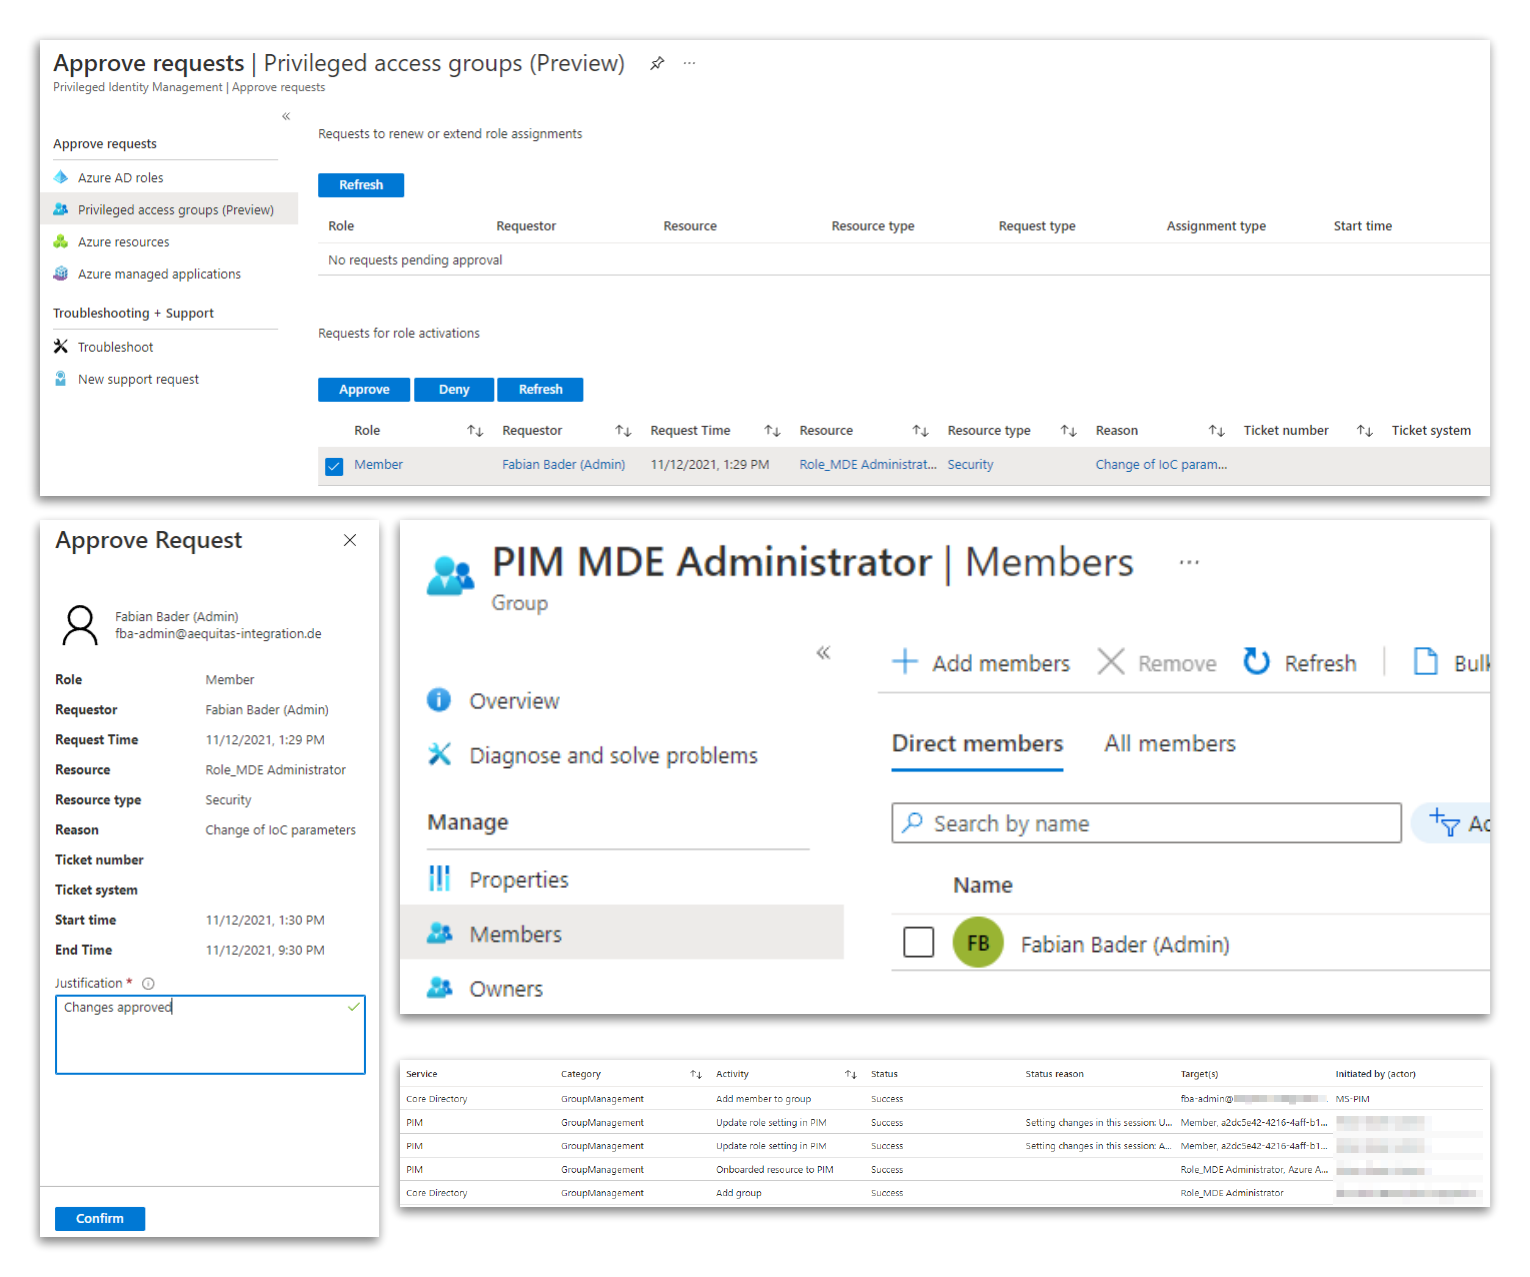
Login with the user that has the permission to approve the request and switch to “Approve requests”. Select the request and click on “Approve”. Depending on your configuration you now must enter a justification and after that the approval is given.
To verify this head over to the “PIM_MDE Administrators” group and check the group membership. The requesting user should be a member of this group. You can also check the audit log to see that “MS-PIM” added the user to the group.
Check access
The last thing to do is to check if you now have access to the Microsoft 365 Defender portal as the requesting user. It might be necessary to log out from the portal if accessed it before. In my testing this was not always the case.
Conclusion
With the privileged access groups feature Privileged Identity Management now is the one-stop-shop for everything related to just in time administration. The possibilities using this new feature are nearly limitless if the application you want to put behind PIM supports Entra ID (Azure AD) groups for role assignments.
Currently there is a limit of 400 Entra ID (Azure AD) groups that use the isAssignableToRole property per tenant.
That you cannot use existing groups is, in my opinion, not a bad thing because it forces you to plan your setup based on the new capabilities.
If you have the necessary licenses, I recommend checking out this feature for every possible administrative application. If you have already implemented Single Sign On with Entra ID (Azure AD) for your applications there should be no good reason not to use this. Even if you must allow active assignments for some use cases, this bundles the administrative roles in one portal and the administrator herself can easily check out which permissions and roles she can use, using the “My roles” blade.
Something that is currently missing is the “Access review” feature, but I think this is just a matter of time.
Personally I would limit the usage of PIM to admin centric use cases and recommend using access packages for more user centric workflows e.g. software assignments.
Additional Links
- What is Entra ID (Azure AD) Privileged Identity Management?
- Use Entra ID (Azure AD) groups to manage role assignments
- Configure privileged access group settings (preview) in Privileged Identity Management
- Management capabilities for Privileged Access groups (preview)
- Manage portal access using role-based access control